
Found this really cute bright MM fabric, Friday while having "fabric therapy" and just couldn't turn it down. (hard to turn down a sale).... But when I saw it, I knew exactly what I wanted to do with it. (which is rare when it comes to fabric, because I never want to cut it. LOL)....
So I decided to do a tutorial for it also, to show how easy it is to make. I hope it will inspire you to give it a try.
This is a McCalls - M6500 pattern that I bought locally on sale for 1.99.... http://mccallpattern.mccall.com/m6500-products-16282.php?page_id=486&search_control=display&list=search. I chose it because it was an easy pattern.
Tutorial
To begin, be sure you have all your supplies together....
pattern, scissors, fabric, thread, pins, machines, iron, etc.... You get the idea.....

Cut out your pattern and iron it out. Yep... You heard right..... getting the creases out makes it more accurate with your cutting. ( I used to not do this, but realized what a difference it makes)... It might be an extra step, but you will find it helps.


Now most patterns will tell you to just lay your pattern on the fold. I find this is very wasteful so I open up my fabric and bring the fold in until there is no fabric extended over the edge.
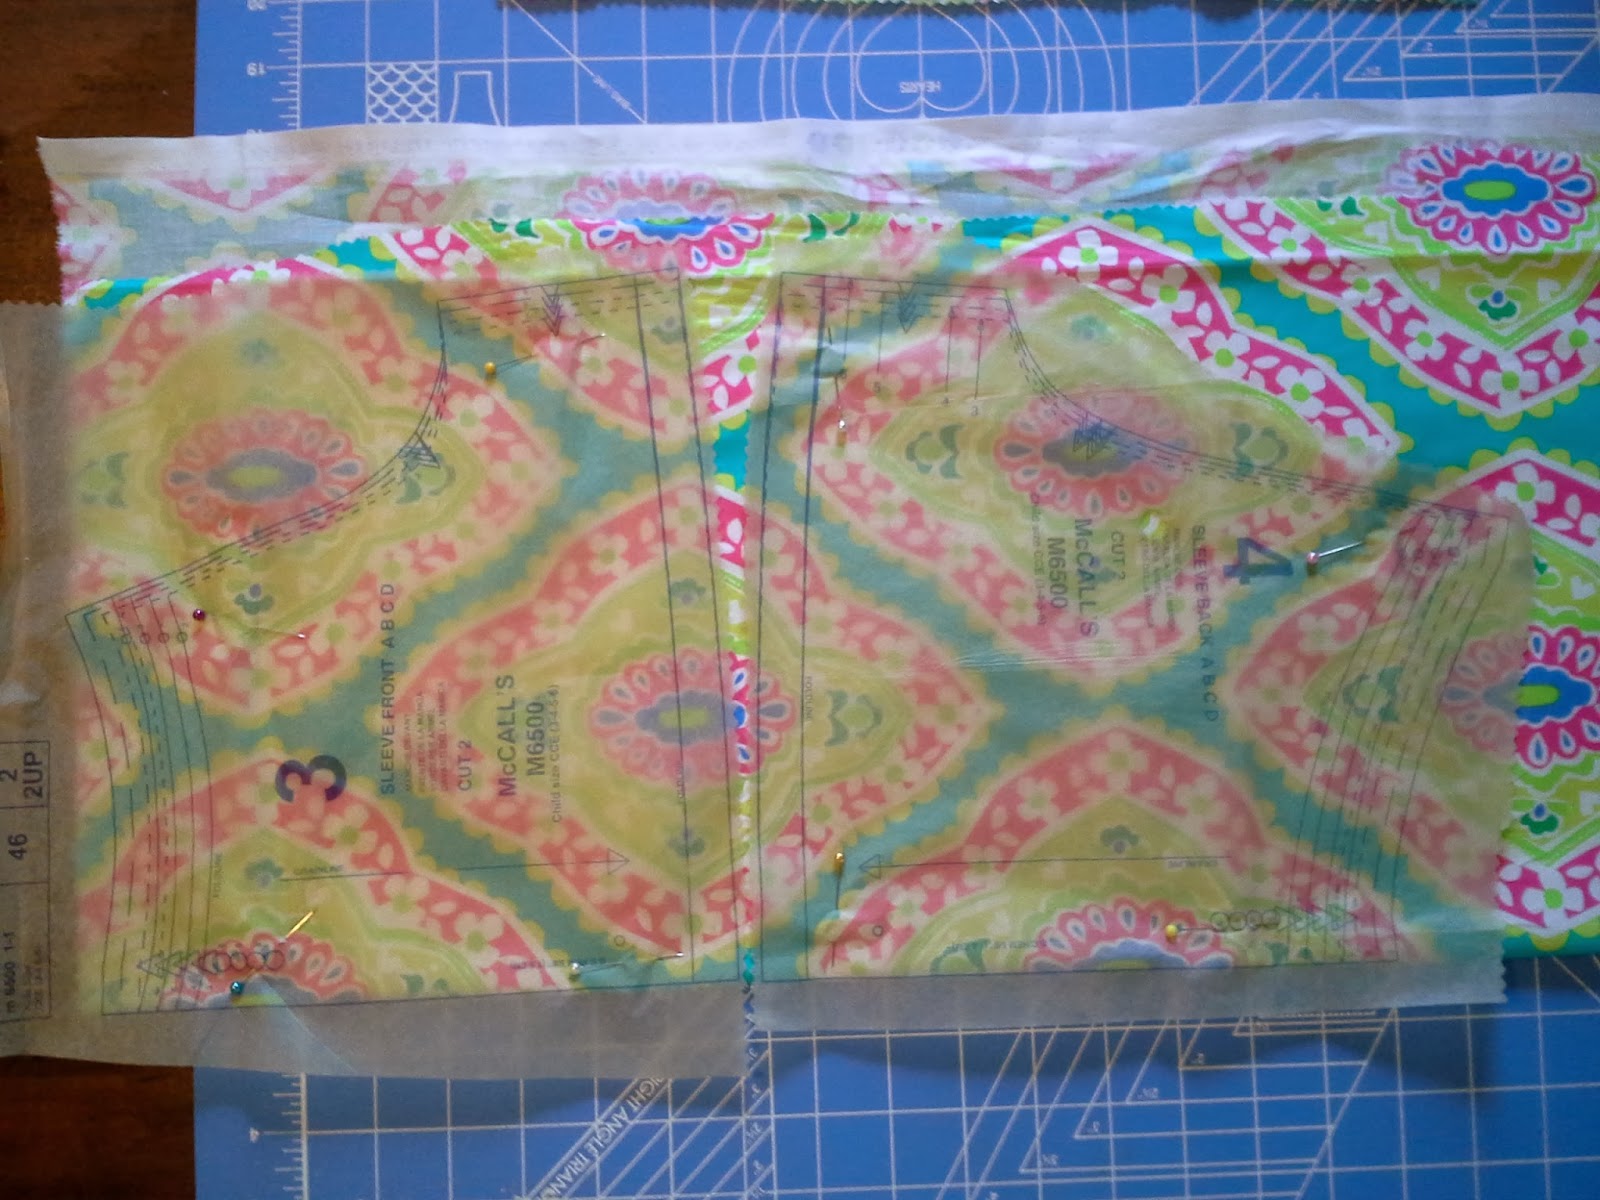
 As you can see in the picture above how close I am to the selvage and the fold is above it....Pin your pattern to your fabric in the corners and in between. I normally will pin the middle of the fold and then the top and bottom. This will keep the pattern from shifting. Even though I've been sewing for over 50+ years, I still pin all around. Just makes it easier to cut my fabric...
Now it's time to cut. Be sure to keep your pattern going in the same direction if you have a one way (nap) fabric. This pattern isn't a nap so it was simple to line up my patterns.

Now it's time to cut. Be sure to keep your pattern going in the same direction if you have a one way (nap) fabric. This pattern isn't a nap so it was simple to line up my patterns.
For the sleeves, I put both sleeves on one fold, as seen in picture below. Again, I'm very conservative with my fabric. (I might need it for another project someday so I try to not use a lot of extra fabric.)
Again cut out the sleeve patterns.
Now, ALL patterns have these little arrows called notches. It helps keep your front and back seams in align. When I first started sewing I would ignore them, but then realized even though they were a hassle; they definitely save a lot of time when you are putting your pieces together. So go ahead clip them like shown in picture. Single notch is for front, and double notch is for the back.

 Now you are ready to begin sewing. Put your pretty fabric to pretty fabric together and pin in place. Be sure you match your notches so your fabric will sew nicely.

I normally glance at the instructions real quick to remind myself what order things are in... So follow your directions on the pattern. The first thing I do is sew up the side seams. Then stitch sleeve front to sleeve back.
Now, ALL patterns have these little arrows called notches. It helps keep your front and back seams in align. When I first started sewing I would ignore them, but then realized even though they were a hassle; they definitely save a lot of time when you are putting your pieces together. So go ahead clip them like shown in picture. Single notch is for front, and double notch is for the back.

As you can see, I use my serger for just about everything. Whether you have a serger or not, you must remove your pins as you come to them. Now you are ready to stitch the underarm seams. Remember to match up your notches.

The above picture show where I've matched my notches and also lined up my seam...

Now you are ready to fold your casing and thread your elastic. When folding the casing, I ALWAYS, iron after I pin. Just makes it easier to sew. This is a pretty forgiving pattern around the neck, because of it's width. If you have a little bunching it is okay, but try your best to go slow and make them as smooth as possible.


Time to take your dress to your machine again and sew it up. Remember to remove your pins as you sew.

When you are sewing your casing, remember to back stitch as you start, then stitch all the way around almost to the beginning and back stitch again. Be sure to leave a large enough opening to thread your elastic. As seen in picture below.


Finish both sleeves and then you are ready for your hemline trim. I have to be honest here, I didn't use the pattern to make the ruffled hem, but made just a "blocked" hem using the two tone chevron. I did this the exact same way I make my pillowcase dress hemlines. So I cut 9.5" X 45. You will have some left over with this pattern because it isn't as wide at the hem as my pillowcase dresses. Fold this fabric so that your hemline is 4.25" wide and however long the dress is at the hemline. (sorry I forgot to measure for the tutorial).


As you see in the picture, I put a pin on the length that I needed to go around the hemline. If this is too difficult or hard to understand my directions, you can either omit this stage or look at the directions for the ruffled hem that is shown. Once I cut the length that I'm needing, I will then stitch my ends together to make a circle, then I pinned the FOLDED fabric to the dress.


 Now you are done! I added a cute bow at the bottom to give it a little pizazz. (this bow can also be used in the hair)....
Love the way this turned out..... Hope you enjoyed the tutorial and will give this a try...Look for more tutorials in the future...
Don't forget to leave comments. And if you have a question, feel free to ask, I will try my best to answer for you.
Finish both sleeves and then you are ready for your hemline trim. I have to be honest here, I didn't use the pattern to make the ruffled hem, but made just a "blocked" hem using the two tone chevron. I did this the exact same way I make my pillowcase dress hemlines. So I cut 9.5" X 45. You will have some left over with this pattern because it isn't as wide at the hem as my pillowcase dresses. Fold this fabric so that your hemline is 4.25" wide and however long the dress is at the hemline. (sorry I forgot to measure for the tutorial).
If you look closely, you will see that the raw edges are going the same way as the dresses raw edges. Once you have pinned this together, then take it to your serger (or sewing machine), and remove the pins as you sew.
Love the way this turned out..... Hope you enjoyed the tutorial and will give this a try...Look for more tutorials in the future...
Don't forget to leave comments. And if you have a question, feel free to ask, I will try my best to answer for you.
No comments:
Post a Comment