Showing posts with label embroidery. Show all posts

Friday, August 14, 2015

Getting ready for BTS....

I had a wonderful time with my new grandbaby and will leave you with a couple of photo's, but since then I've been busy with our back to school kids.  Everyone wants their backpack with names and monograms on them.  I also was busy with the High School Tennis girls and the new Tennis Racquet Backpacks. Also, if I have some time, I would like to set up a booth with our Switch A Roos sales held here at the Spartanburg Auditorium.

Until then here are a few samples what I've been working on, including some other items that aren't school related.


One of my granddaughters suite mates at her college wanted a monogram on her book bag.  It was her first monogram.  I was thrilled to do it for her. 

Can't believe how perfect the thread matched....

Just a reminder of my granddaugthers tennis racquet backpack... She is such a great advertisement for me. ;) Even though you can barely see the monogram, in person it is really bright and stands out well... From this I started getting more orders. Here are a couple of those...

Each bag includes an embroidered tennis towel.  Makes it a little more enticing.  Plus they save $25.00 if they buy it as a set.  Bags alone are $45.00 and the embroidered towels are $15.00. These prices do not include monograms and initial.  So buying both for $50.00 with monograms included you are really saving a lot. 

Thought you might like to see the process that goes with making these so unique. 

Cosmetic bags for girls is a popular thing...But I'm sure these could be used for other purposes also.

Aprons are perfect for teachers to wear to protect their clothes, from paints and dirty hands. 


Pretty ticking apron and dish towel set for the kitchen.

So there you have it just a smidge of what I've been doing since I've been back home.   Will share next time photo's of Emmy with me.  Hope these have inspired you to try.  Thank you for visiting.  I appreciate it.


Wednesday, February 19, 2014

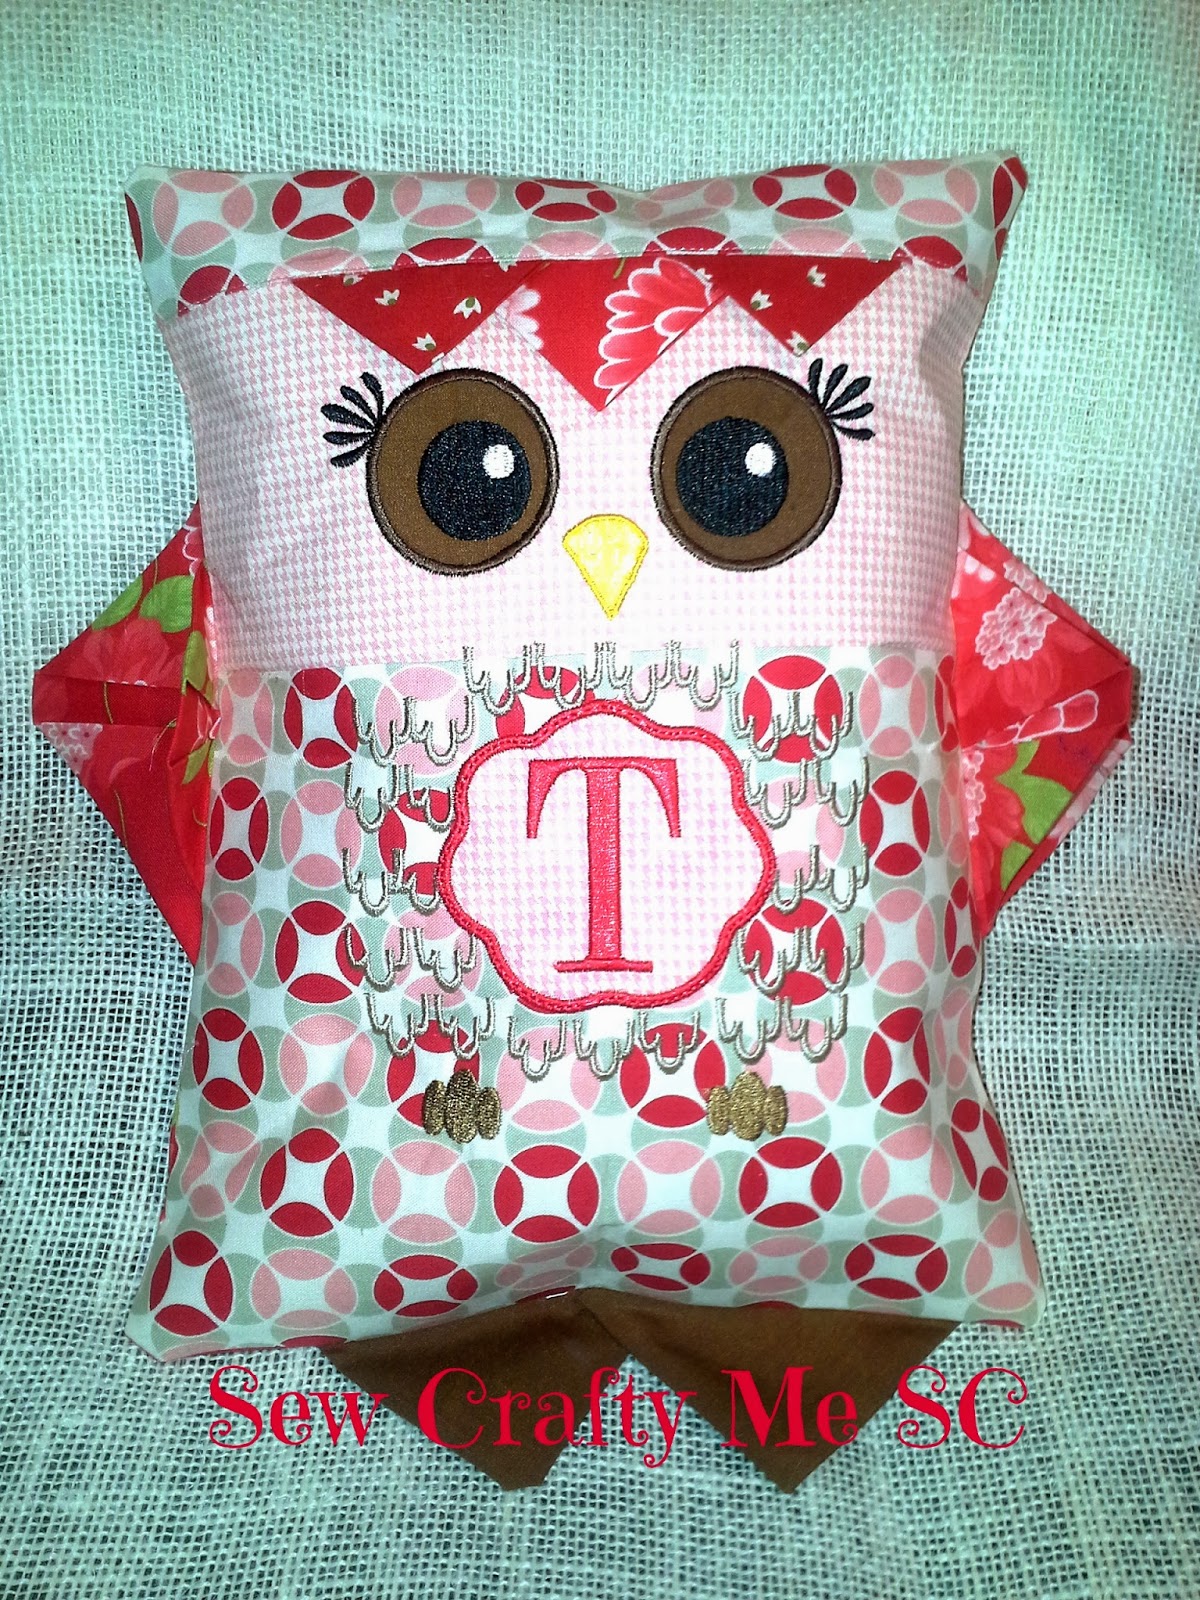
WHOOO T Owl

Come check this out!

I'm in LOVE with this cute cute owl... Part of the pattern is from http://www.sewmichelle.com .  I used her Spiral Notebook cover and added some dimensions with the wings and feet and came up with this adorable pillow...  It started out looking like this....
And finished looking like this....


Everything is the same on the pattern, but what I did different was gave it flapping wings, which were the interior flaps for the notebook to slip into.  I made them just like prairie points but reversed so you see the opening... For the feet, I also cut my squares and made prairie points and placed them so the points are solid on the outside.    The backing is the envelope style which makes it more convenient to switch out my pillow designs...


So there you have it!  My Spiral Notebook pattern turned pillow.... Hope you like it.  Check out Michelle's website.  You will enjoy her patterns....


Monday, December 16, 2013

Embellishing Your Sweat Shirt more....

This morning when I woke up the thought came to me to add lace around the neck of my monogrammed sweatshirt.  But after looking at my supplies I decided on raveled ruffled rosettes.  So here we go..... Hope this will inspire you to do something you might not think about....

These rosettes were glued on with Beacon Fabri-tac.... But if you want to hand stitch or machine sew you can do that too.... It was a really quick project and turned out beautiful. (I think, anyway.)
I would love to hear your comments. 

Instructions:
1 pair of scissors.
1 yard of Rosettes
1 altered sweatshirt (link here for instructions)
1 bottle of Fabri-tac (or other fabric glue)
10 minutes of your time...

Make sure your shirt has been washed before you apply your embellishment, to prevent any mishaps of shrinking).
Take your shirt and around the neckline, apply your glue a little at a time.  Pressing with your fingers as you wrap the rosettes around the neckline... I started on the shoulder seam but you can start in the back if you want to.

Once you have made it all around then cut the remaining rosettes off and YOU ARE FINISHED!!!
Now wasn't that easy?

If you don't want to do the neckline, you can apply it around the hemline, or the cuffs, or all three places, if you really want to bling it out!

Now that you have seen how it's done, find an old sweatshirt and give it new life with this cute embellishment.  Don't like the rosettes, you can do the same with ruffles, beading, lace.... It's unlimited what you can do with your altered sweatshirt.... Just have fun with it....

 
glue around edge
 
 
holding it in place for a few seconds
 
 
the finished product.  (which after looking at this photo, might get something on the cuffs. LOL)